If you’re trying to embed the Splynx login in your own website (for branding, seamless customer UX, etc.), here’s what you need to know:
1. Twig/Template Customizations Are Dead
If you’ve used Splynx for a while, you might remember being able to override portal Twig templates directly (e.g. login.twig).
That’s no longer possible in recent Splynx versions!
The login page is now locked down; direct Twig or template overrides won’t work. (I spent hours on this—don’t bother.)
2. The Only Real Solution: Use the Add-On Module System
I opened a support ticket, and Splynx support confirmed:
“The best option for changing the customer portal is through the add-on entry points. You can create a new add-on on your Splynx instance and set the appropriate entry points with the corresponding style customization.”
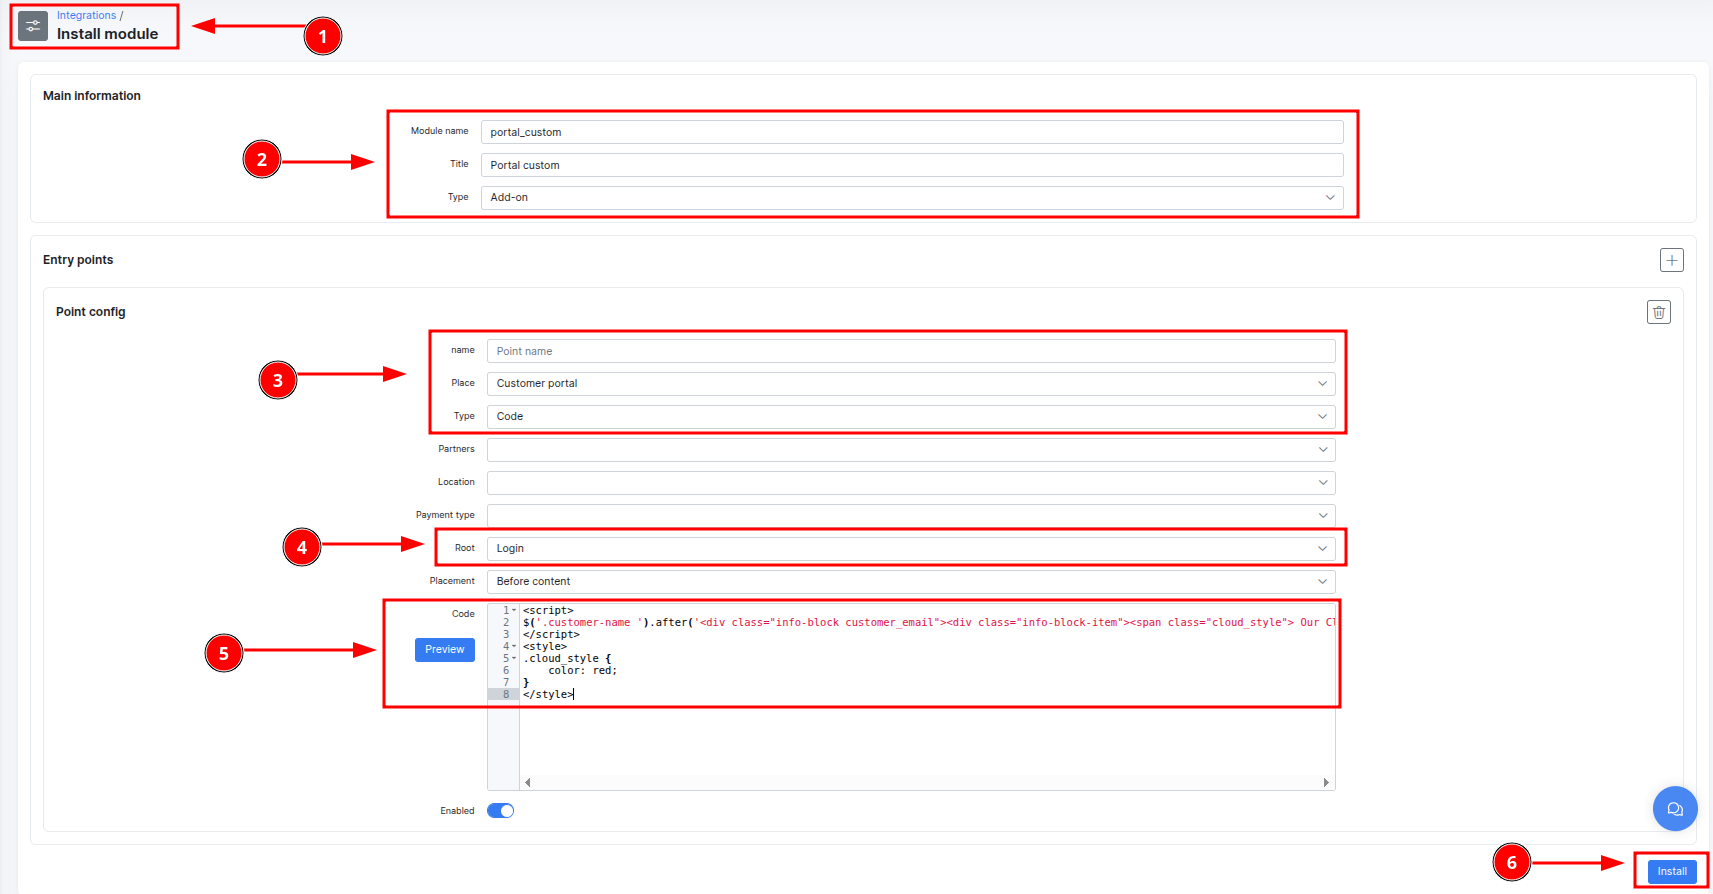
Steps:
- Go to Integrations → Install module
- Fill in Main Info:
- Module name, title, type (Add-on)
- Add an Entry Point:
- Place: Customer portal
- Type: Code
- Set Point:
- Root: Login (or the page you want)
- Placement: Before content (or as needed)
- Add your CSS/JS:
- Insert your
<style>...</style>or<script>...</script>in the code box - Example: Hide parts of the default login, override styles, etc.
- Click Install
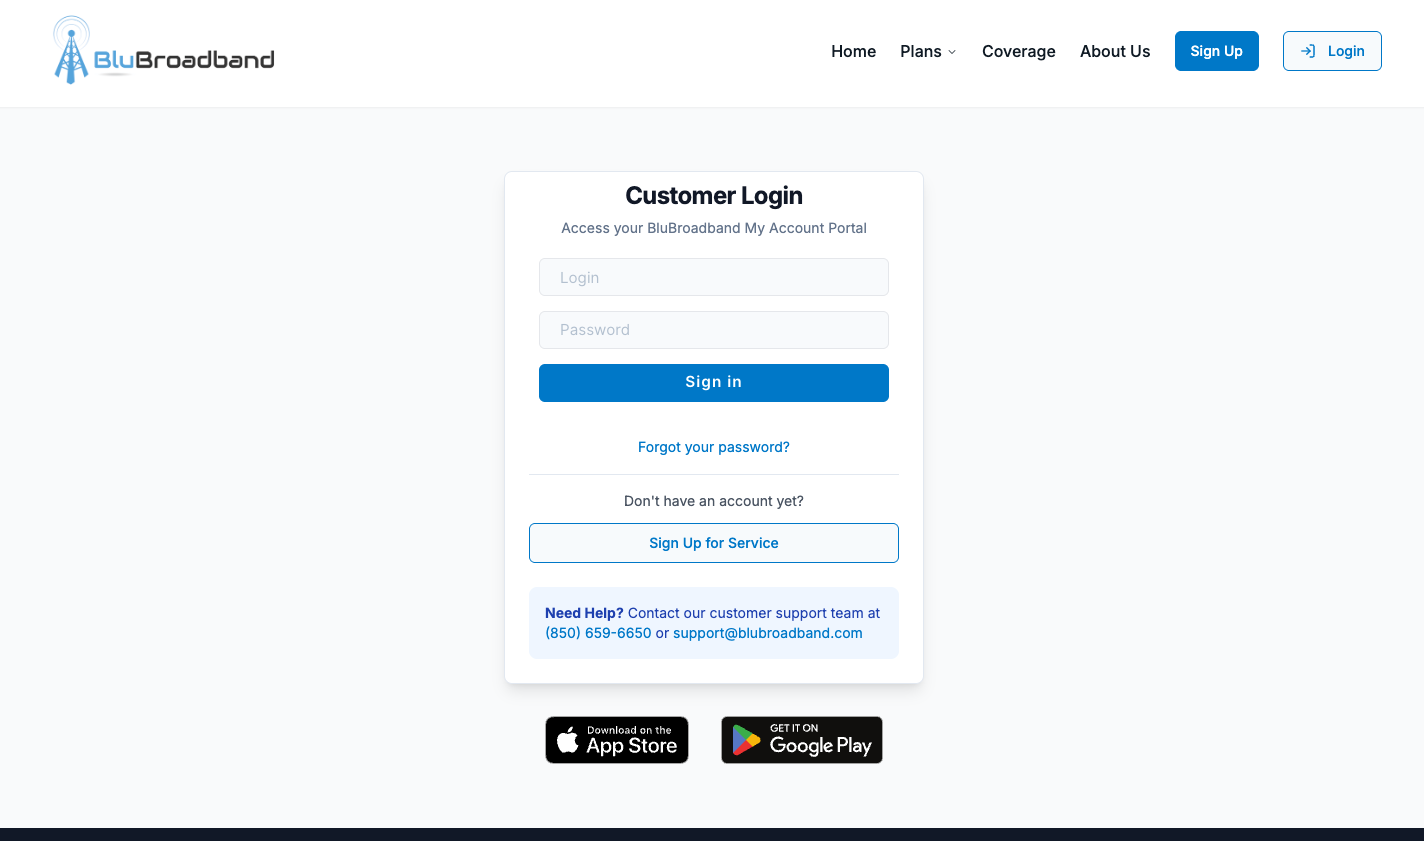
3. Embedding in Your Website: Use an iFrame
- Since direct template overrides are impossible, the only way to embed the login in your external website is via an
<iframe>pointing to the login page. - The catch? The default Splynx portal layout is NOT made for embedding—so you must:
- Use your module add-on to hide everything except the form
- Override padding, backgrounds, etc. with CSS injected from the module
- Style the login fields to match your branding
To embed the cleaned-up login page in your site:
`<iframe
  src="https://admin.yourisp.com/portal/login?iframe"
  width="100%"
  height="200"
  style={{
    border: "none",
    borderRadius: 0,
    display: "block",
    margin: 0,
    padding: 0,
    overflow: "hidden",
    background: "transparent",
    width: "100%",
  }}
  scrolling="no"
  title="Customer Login"
/>
`
4. Challenges & Solutions
a) Hiding Unwanted Portal Content
- Use your entry-point module’s
<style>block to hide logos, footers, backgrounds, and right-side shapes. - Use
display: none !important;on all unnecessary elements.
b) iFrame Sizing & Responsiveness
- On your own website, make your iframe width 100%, no border/padding.
- On mobile, use CSS transforms to visually scale down the login form so it doesn’t get cut off.
- Tweak both iframe and card container styles for perfect pixel matching.
c) Maintenance
- Whenever Splynx updates their portal, double-check your add-on still works! Some class names or element structures may change.
5. Final Tips
- Do not attempt to override templates or upload custom Twig files—they will not load.
- All real customization is done through the module entry-point system as described above.
- For mobile-friendliness: Use external CSS on your site to visually scale the iframe contents for smaller screens.
Summary:
Twig overrides are dead. Use the add-on entry point system to inject custom CSS/JS, hide everything but the form, and use an iFrame to embed in your site.